Paper menus are gone and now is the time for digitalized menus. Right from going for digital menu boards, QR codes to interactive menus on tablets, we have it all.
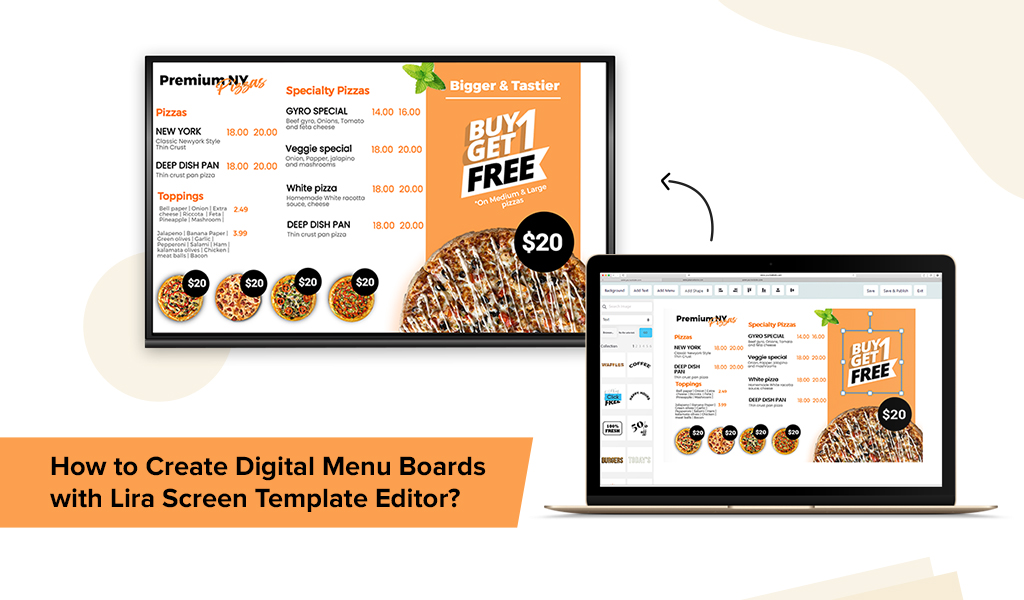
Today we will talk about how to set up an interactive digital menu on tablets using Lira Screen. In layman terms, it is like converting your paper menu into a much presentable form such that a user can get all the information and make their choice to order easily.
How to Create Restaurant Digital Menu using Lira Screen
1. Go to App store section in Lira Screen Panel
2. You will find an app named ‘Digital Menu Ordering’.
3. Click on the app and go inside the Configure Menu option
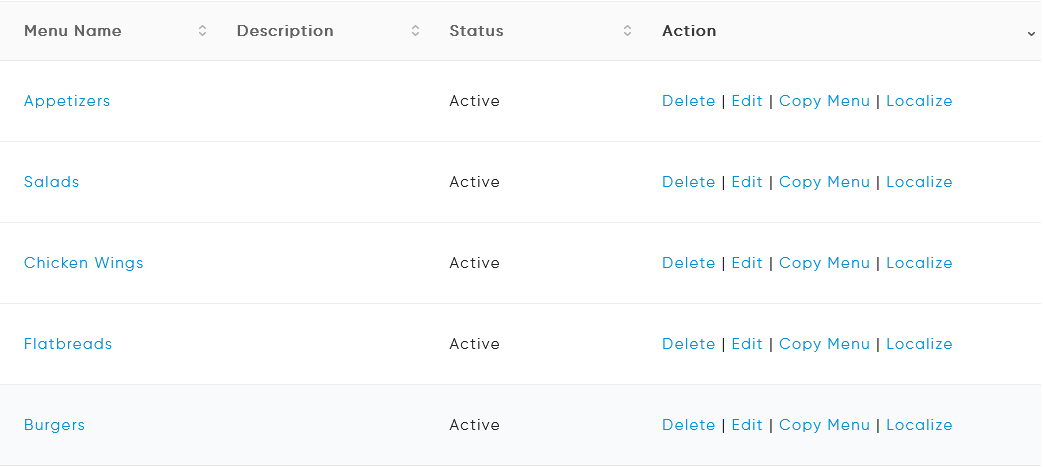
4. Tap on Create Menu and enter the main menu name

5. Give proper names to the categories. Categories here mean the sub-sections in the app like sandwiches, burgers, beverages….
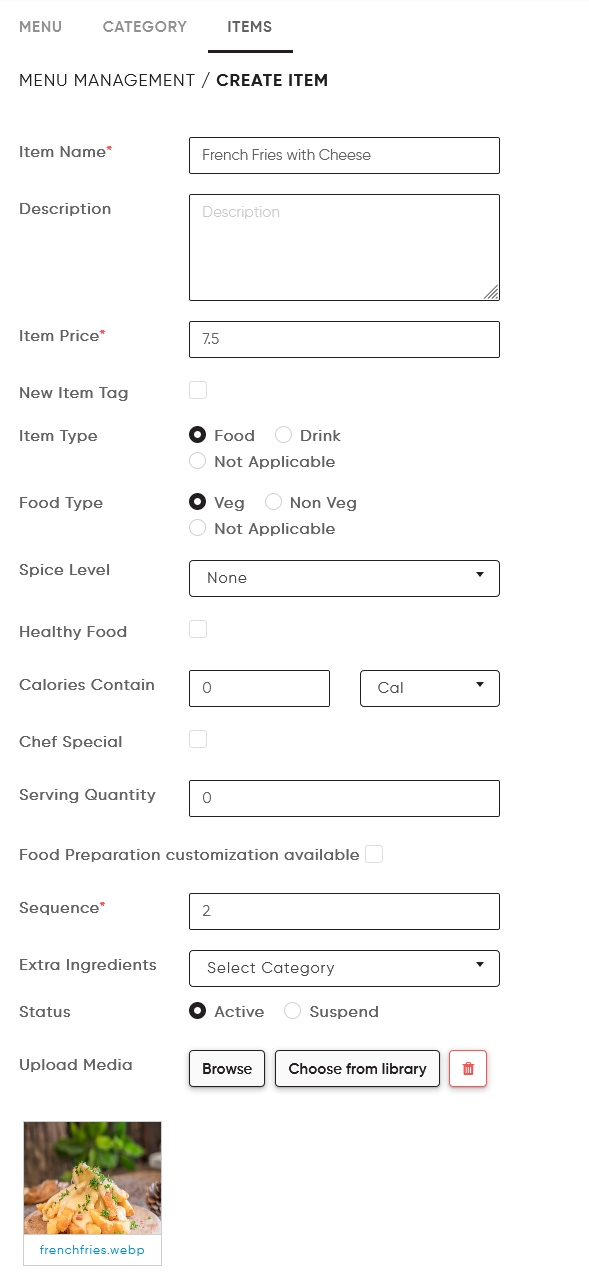
6. To add the menu items, click on create item: Along with the Item name you can enter several other details like item price, item description, select the spice level, select the healthy food option to be considered if any, mention the amount of calories contained in the item, serving quantity and add an image of the item.
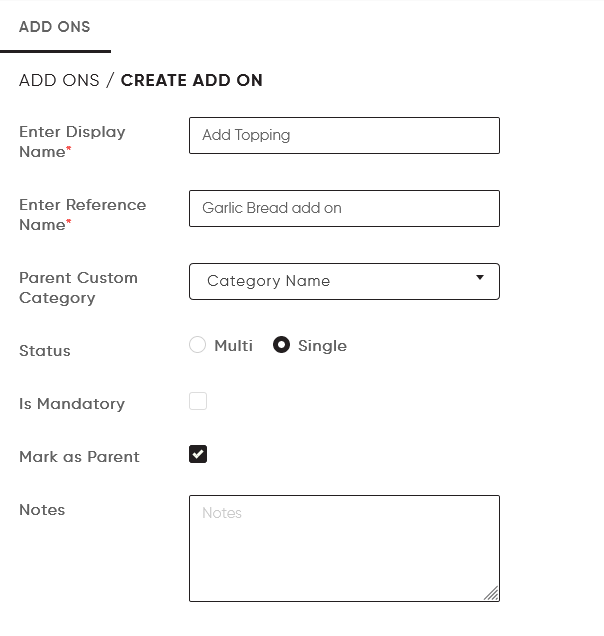
7. To configure extra ingredients to your food item, tap on ‘Configure Addons’ in your main menu screen.
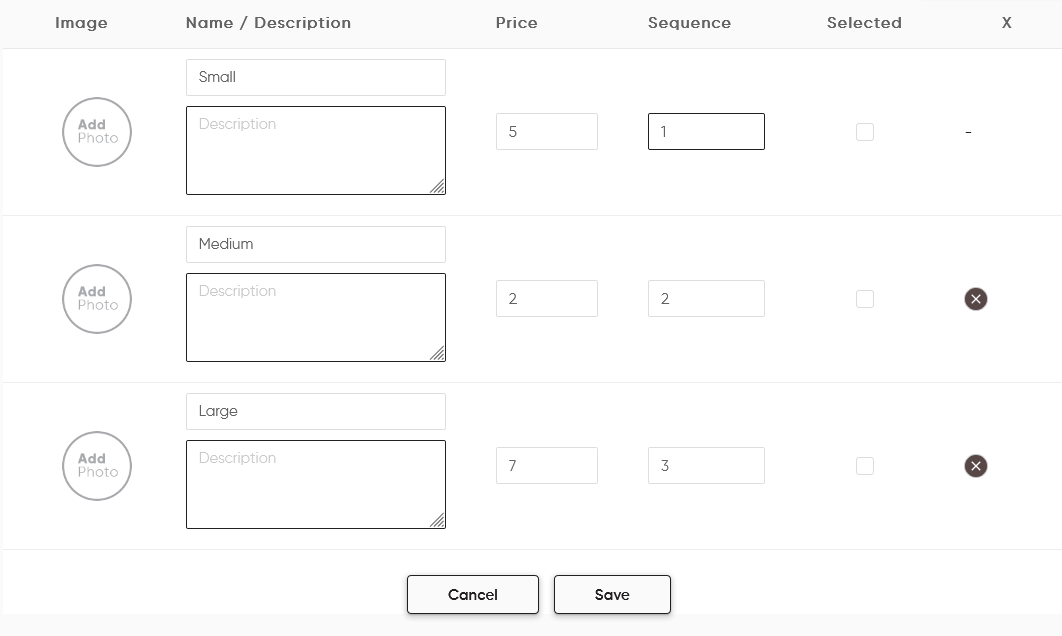
8. Some items in the menu will need special customizations like different sizes, price according to the sizes, choices of toppings and sauces. e.g. If you want to configure pizza ingredients then first you must ask the customer to select its size – like small, medium, and large. Tap on the ‘Create New’ button and start adding these options.
9. You need to add the size as the parent category here since prices of the other ingredients will depend on the size which has been selected by the customer.
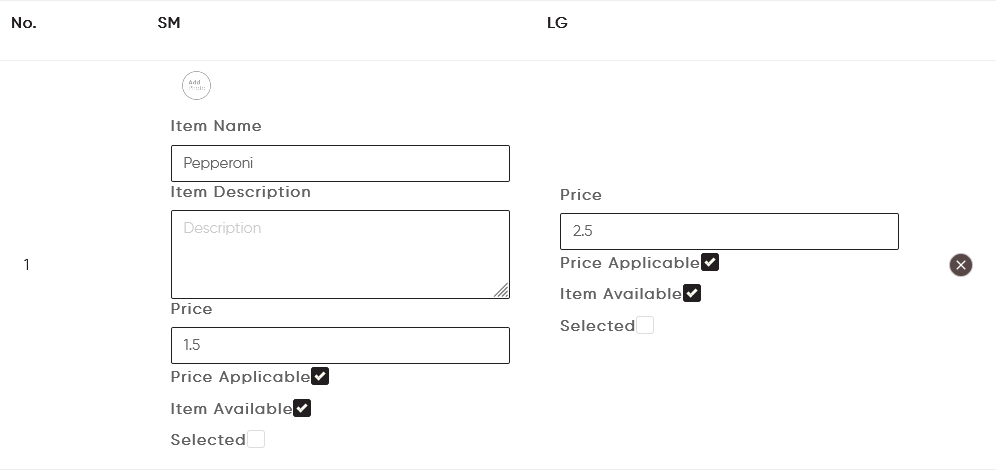
10. Once the parent category is created, start adding other ingredient options as needed like choice of crust, additional toppings, choice of sauces under the ‘Extra-Ingredient Sub-Categories’ section.
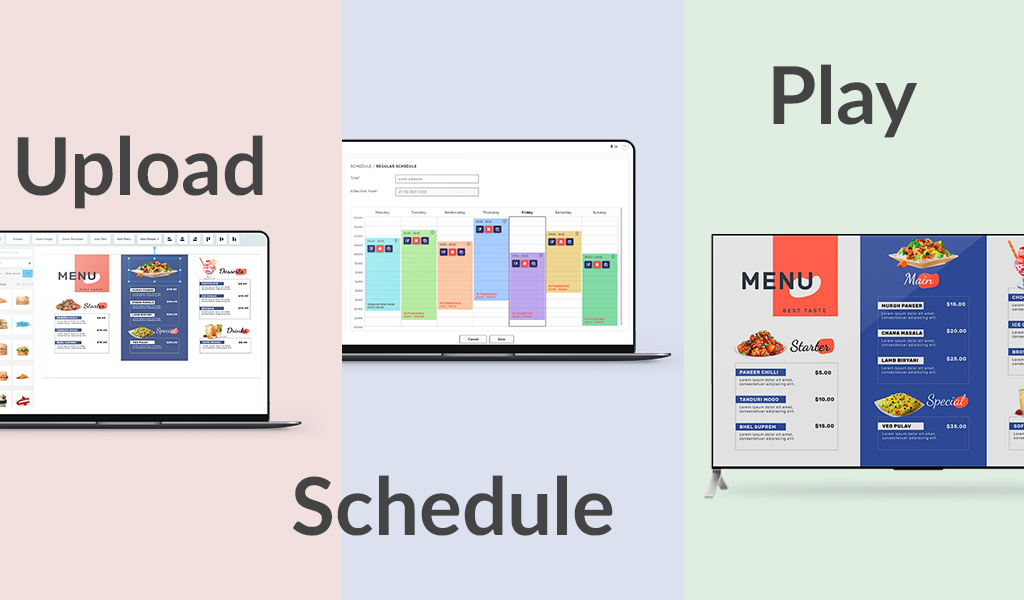
The next step is to configure the digital menu ordering:
Once you are inside the Digital Menu Ordering section, tap on ‘Create Digital Menu.
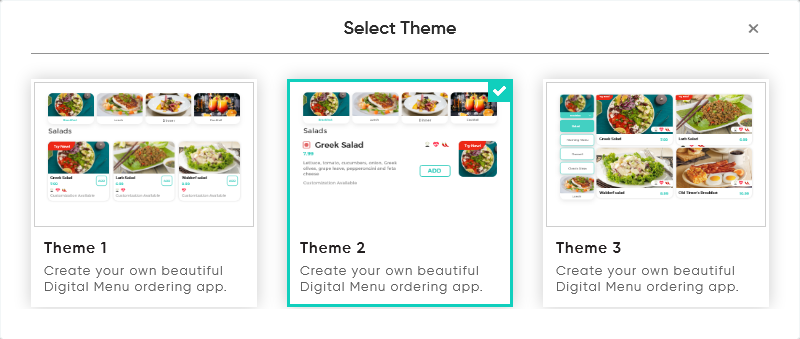
Input the logo of your restaurant and select a theme from the available themes.
Browse the Background image for the menu home screen from your PC or Laptop.
You can also set the colors of your choice to apply to the main parts of the menu like category name, Item name using theme color function.
Select a highlight color that will be used for the theme color.
Go on to select the font type for the main parts like categories using Button Fonts function. Effects like Bold, Italics or underline can also be given.
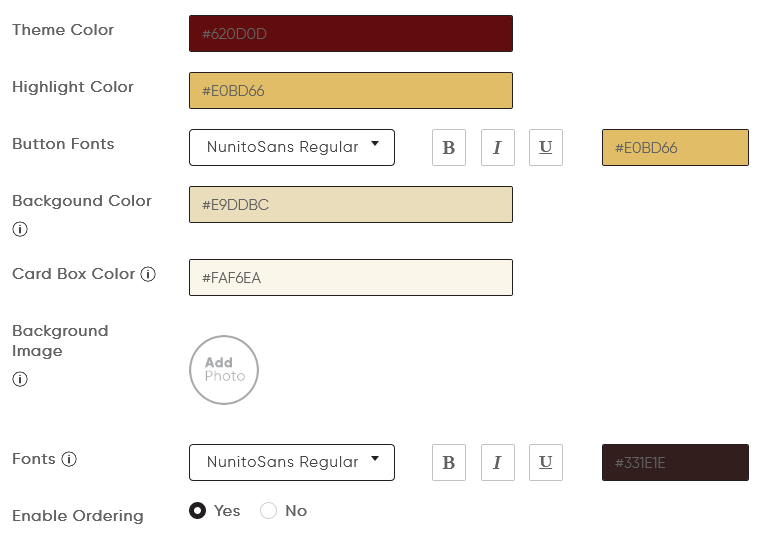
The details for the feedback and offer section can be managed from the ‘Create Digital Menu’ screen itself.
Background Color: Once the digital menu has been created, you will have offers and a feedback section as well available for the users. The section of Background color on this screen is only for the feedback and offer section.
Card Box Color: This option also applies to the feedback section. The card box wherein the user can give the feedback can be selected from this option.
The Background Image and the Fonts section below Card Box Color will also apply to the Feedback and Offer section.
Tap on save, once you are done with selections and filling up all the details as needed.
You can see that three options are created – Menu, Feedback and Offers.
Once the Digital Menu is created, you can tap on the menu, and you will be redirected to the next screen to input the below details:
1. Type in the name of the menu as you need.
2. From the list of categories, select the ones that you wish to display for that particular menu. You can also choose if you do not wish to show category titles or descriptions in the menu.
3. Select the type of currency in which you want the menu item prices to be displayed.
4. We have different types of fonts available which can be selected for Categories, Items, Prices, and descriptions.
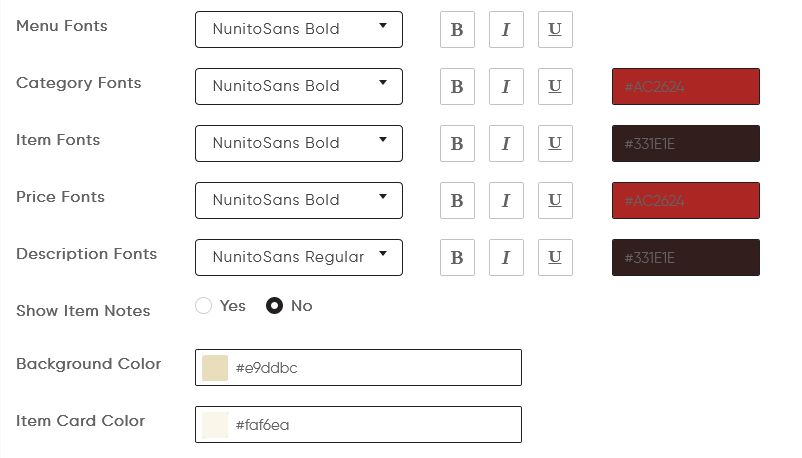
5.Select the Background color for the menu and the item card color that matches the background.
6. Once details have been filled in, tap on ‘Save’ again and you will see the menu is created.
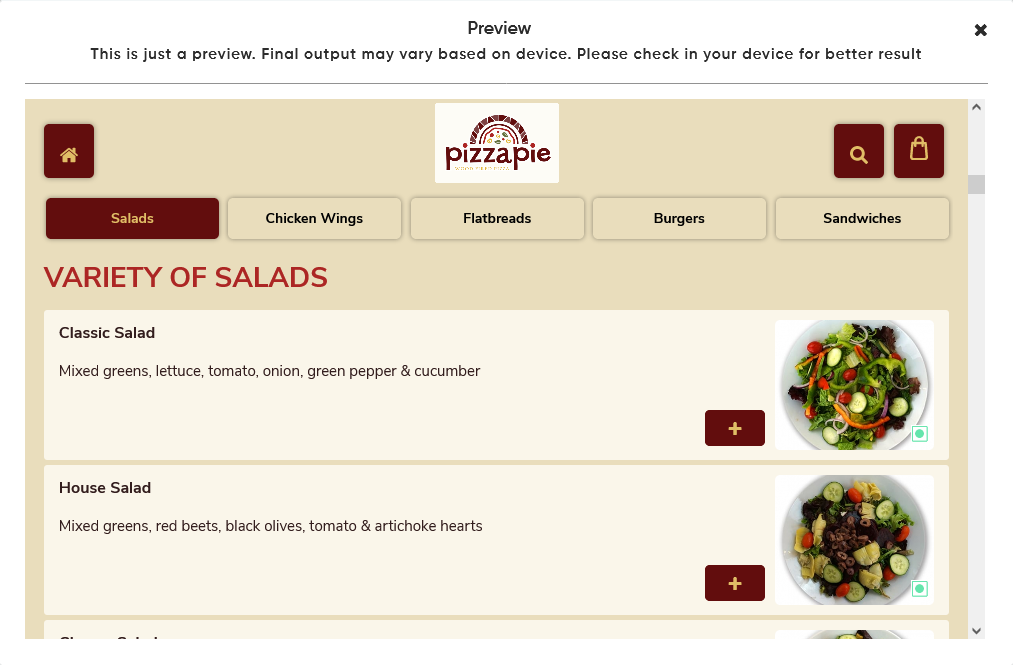
You can preview the menu created by tapping on the Preview button.
These few steps, and your digital menu is created and configured to get started for service. Reach us out on support@lirascreen.com in case of any queries that you might have to get this started.